
Preparing your floor for leveling is an often underestimated but crucial task that lays the foundation for a seamless and durable flooring installation. A level floor not only enhances the aesthetics of your space but also ensures the longevity of your flooring material. In this comprehensive guide, we will walk you through the intricate process of floor preparation, equipping you with the knowledge and skills necessary to create a perfectly smooth surface.
Assessing the Floor
Before embarking on the floor preparation journey, it is vital to assess the current condition of your floor. Begin by conducting a thorough inspection, scrutinizing the entire area for uneven surfaces, cracks, and other imperfections. Use a long straightedge or a level to identify high and low spots. Addressing these issues at this stage will save you time and effort down the road. Additionally, check for any moisture problems, as excess moisture can hinder the effectiveness of leveling materials.
Gathering Necessary Tools and Materials
To execute the floor preparation process effectively, you’ll need a range of tools and materials at your disposal. These include leveling compound, plywood underlayment, a trowel, a level, sandpaper, a utility knife, and primer, among others. Opt for high-quality tools and materials to ensure a successful outcome. These items are readily available at your local hardware store or online retailers. Be sure to read product labels and follow manufacturer instructions for optimal results. If you don’t have the necessary tools and materials you’ll be better off hiring professional leveling concrete contractors.
Safety Precautions

Safety should be your utmost concern when preparing your floor. Protect yourself by wearing essential safety gear, including safety goggles, gloves, and a dust mask. Adequate ventilation in the work area is absolutely crucial, particularly when dealing with products like adhesives and primers that release potentially harmful fumes. Always strictly adhere to safety guidelines and take all necessary precautions to prevent accidents and injuries. Remember, your well-being is non-negotiable, and every step should be taken to ensure a safe working environment.
Removing Furniture and Fixtures
The process begins by meticulously clearing your workspace of all furniture and fixtures. This initial step not only provides a clean canvas for your work but also safeguards your belongings from potential damage. When faced with the challenge of moving heavy or unwieldy furniture, consider temporary storage solutions like renting a storage unit or utilizing an unused room. If moving your furniture is impractical, take the time to cover each piece meticulously with protective materials, ensuring they are shielded from the inevitable dust and debris that accompany floor preparation.
Cleaning the Floor
To ensure the proper adhesion of leveling materials, achieving a pristine and debris-free surface is paramount. This task starts with a thorough cleaning of the floor, leaving no remnants of debris, dust, or dirt behind. Employ a broom and a vacuum cleaner to guarantee that no particles are overlooked. Stubborn stains or lingering adhesive residues may necessitate the use of specialized cleaning products and techniques. The ultimate objective is to establish an immaculate canvas, free from any hindrances to your leveling endeavors.
Fixing Cracks and Holes
With your floor now clean and void of debris, it’s time to address any existing cracks or holes. Identifying these imperfections is crucial since they can severely impact the success of the leveling process if left unattended. Begin by utilizing a utility knife to carefully remove loose debris from within the cracks. Subsequently, fill these cracks and holes with an appropriate patching compound, following the manufacturer’s instructions regarding mixing and application. To achieve optimal results, it’s essential to allow ample time for the compound to dry thoroughly before proceeding with the subsequent steps.
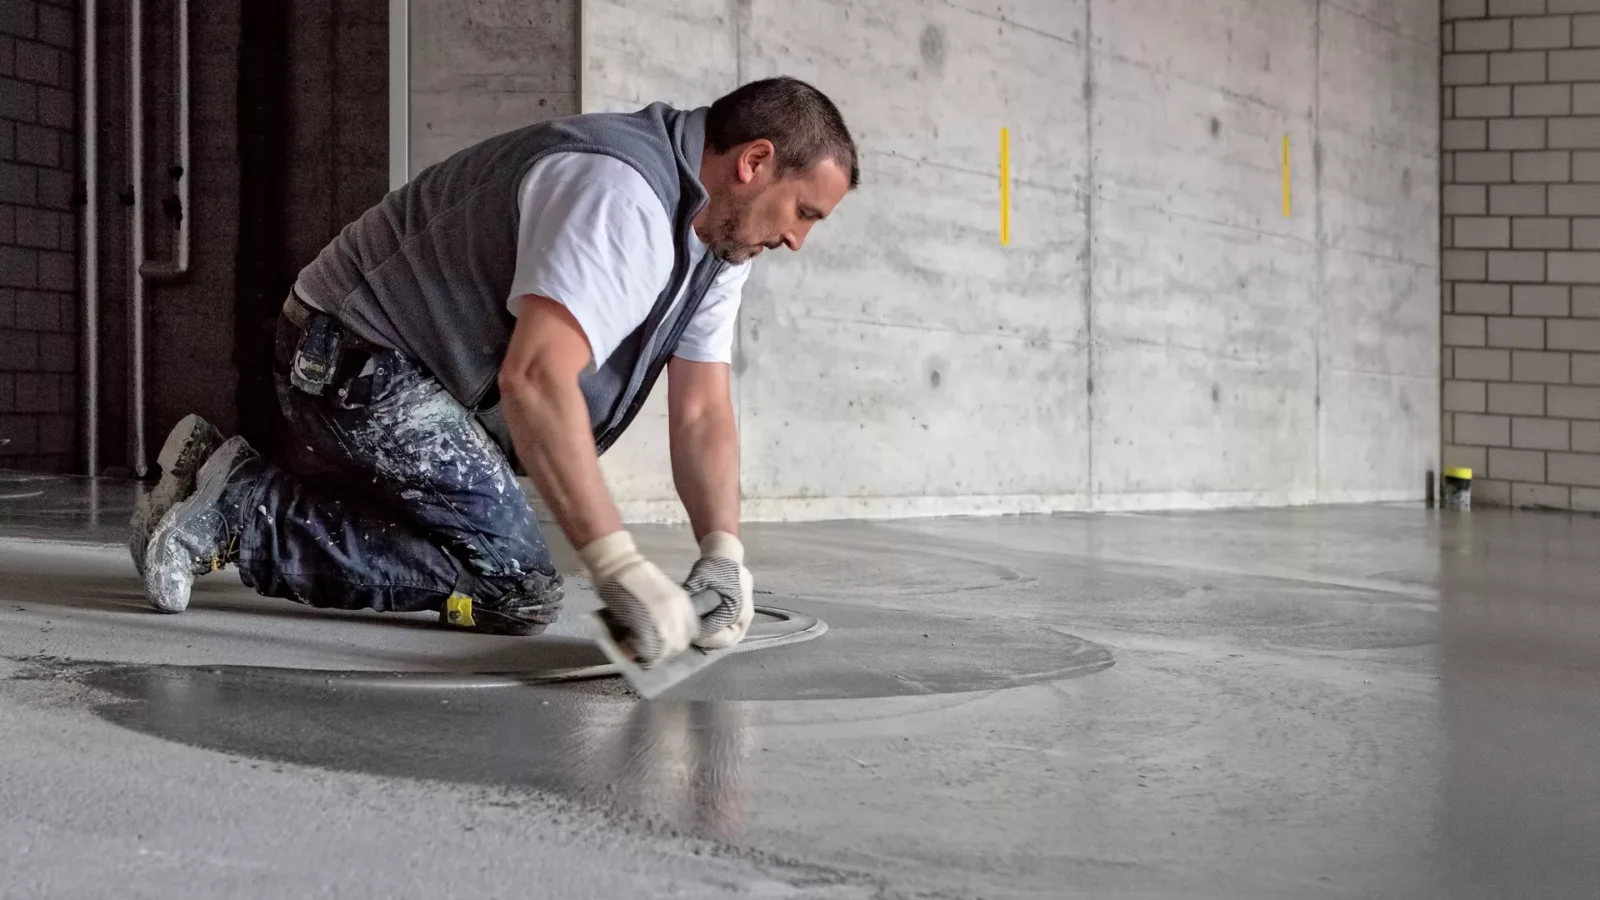
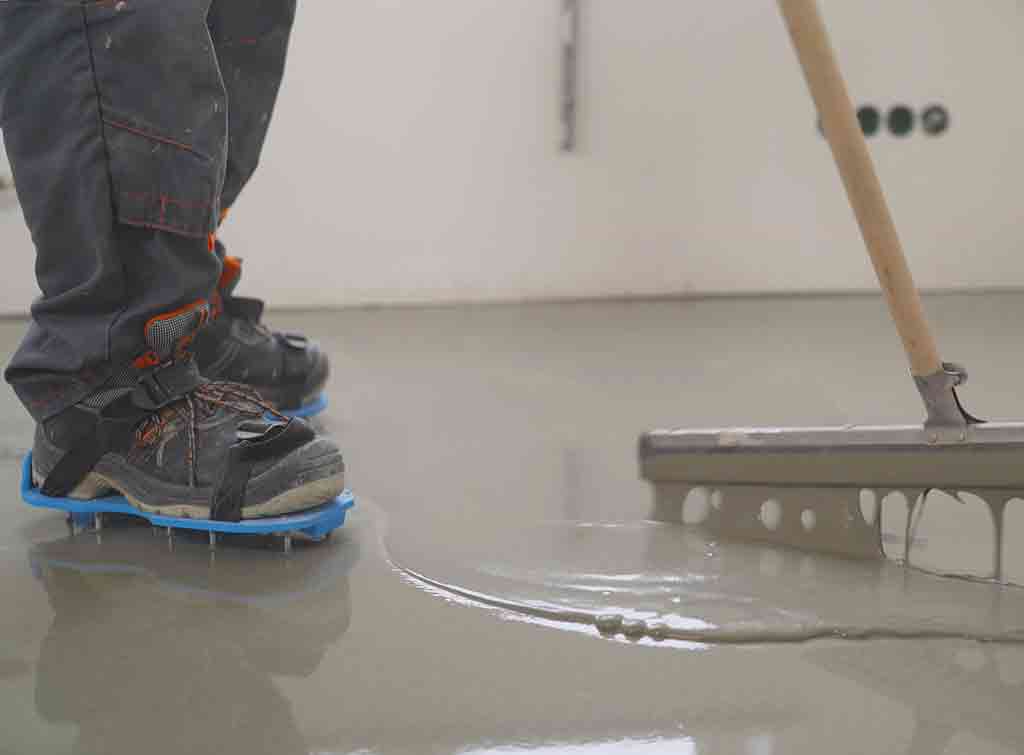
Leveling the Subfloor
Achieving a perfectly level surface hinges on the condition of the subfloor. Depending on the specific needs of your project, you have the option of employing either self-leveling compound or plywood underlayment to address any remaining irregularities. Self-leveling compound is well-suited for correcting minor deviations, while plywood underlayment is better equipped to handle larger variations. To ensure precision and consistency, adhere diligently to the manufacturer’s guidelines when applying these materials. The result should be a uniformly level subfloor that forms the foundation for your chosen flooring.
Sanding and Smoothing
Now that the subfloor is leveled, the next step involves refining the surface further. Sanding plays a pivotal role in eliminating any rough patches and achieving a uniformly smooth finish. The selection of the appropriate grit sandpaper is crucial, as is the use of a reliable sander to smooth the entire surface. Keep in mind that this stage may generate dust, so it is imperative to continue wearing your safety gear and maintain proper ventilation throughout the process.
Checking for Levelness
The ultimate goal in your floor preparation journey is to attain a flawlessly level floor. To ascertain this, utilize a level or straightedge to conduct a thorough inspection of the entire surface. No detail is too minor, as even the slightest imperfection can have a notable impact on the final outcome. Should you identify any areas that require adjustment, be prepared to employ additional leveling compound or sanding as necessary to achieve the desired levelness.
Priming the Surface
Before applying your chosen flooring material, it is essential to prime the prepared floor. Primer serves as a critical foundation for improved adhesion, ensuring that your flooring material bonds securely to the surface. Carefully adhere to the manufacturer’s instructions for the primer, including adhering to the recommended drying time. Once the primer has fully dried, your floor will be primed and ready to receive its final finish.
Final Inspections and Next Steps
Congratulations! You’ve successfully prepped your floor for leveling. To wrap up, conduct a final inspection of the entire surface, checking for any overlooked imperfections. Once you’re satisfied with the levelness and smoothness of the floor, you can proceed with installing your desired flooring material, whether it’s hardwood, tile, carpet, or any other option. Follow the installation instructions specific to your chosen flooring to complete your project.


